Overview
This guide describes how to configure and use Identity Guardian on supported Zebra wearable computers, which feature a specialized layout for smaller displays.
The wearable UI is applied automatically when Identity Guardian is launched on a supported device model. The experience is designed to be consistent with the standard Identity Guardian authentication framework while being optimized for limited screen sizes.
Scope
In-Scope Features
The following features are supported for the wearable UI:
- Admin Bypass authentication
- Barcode authentication
- NFC authentication
- Face authentication
- Passcode authentication
- Alternate Sign-In
- Switch User
- Sign Out
- Suppress Camera Preview
Out-of-Scope Features
The following features are not supported for the wearable UI:
- Personally Assigned Device mode
- Single Sign-On (SSO)
- Guardian Safe
- Credential autofill
- User enrollment
Supported Devices
| Device | Supported Status | Support Information |
|---|---|---|
| WS301 | Supported | Supports all authentication methods described in this document, subject to available hardware. |
| WS501 | Supported (Limited) | No built-in front camera; face authentication cannot be performed. |
Prerequisites
Confirm the following requirements prior to deployment:
- Identity Guardian Installation & Licensing: Identity Guardian is installed. An Identity Guardian license is required when deploying facial biometric authentication on supported wearable devices, such as WS301.
- Android Screen Lock Configuration: The device Android screen lock is set to "None." Other screen lock types (e.g., Swipe, PIN) are incompatible.
- Pre-Enrolled User Profiles: Users are already enrolled. Enrollment must be performed on a standard Zebra mobile computer, as on-device enrollment is not supported on wearable devices.
- Device Ownership: The device is deployed as a Shared Device. Personally Assigned Device mode is not supported on wearable devices.
- DataWedge Profile Configuration: For barcode-based authentication, the Identity Guardian DataWedge profile is present and active the device.
Configuration
To enable the wearable experience, configure Identity Guardian Managed Configurations using a supported EMM or Zebra DNA Cloud. This section covers only the parameters relevant to wearable devices.
- Usage Mode: Set Application Mode to Authentication.
- Shared Device Authentication: Set the authentication factors for each Verification Setup:
- Comparison Source: BARCODE or NFC
- Primary Authentication Factor: FACE or PASSCODE
- Secondary Authentication Factor: FACE, PASSCODE, or NONE
- Fallback Authentication Method: NONE, PASSCODE, FACE, or ADMIN BYPASS PASSCODE
Note: Configuring other Comparison Source values or Authentication Factors (such as SSO, CLOUD_PASSCODE, or ANDROID_LOCK) may result in undefined behavior on wearable devices and is not supported.
Lock Screen
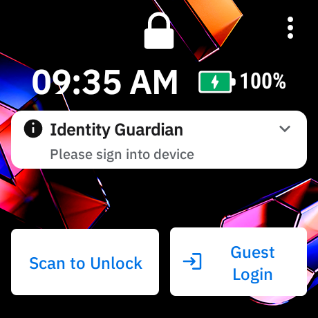
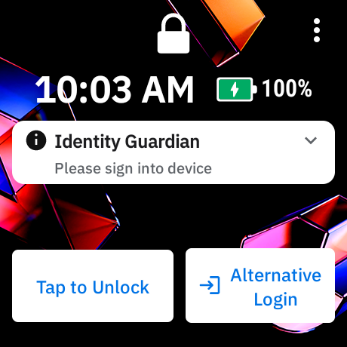
The lock screen on a wearable device displays the time, battery status, an Identity Guardian status message, and one or two action buttons. The buttons presented are determined by the managed configuration.
Lock Screen Button Configurations
The lock screen dynamically displays action buttons based on the deployed Managed Configuration. The primary (left) button initiates the primary authentication flow, while the secondary (right) button provides an alternative sign-in path or user session switch.
| Screen Capture | Primary (Left) Button | Secondary (Right) Button | Managed Configuration |
|---|---|---|---|
|
Scan to Unlock |
Configurable (e.g., Guest Login) |
|
|
Tap to Unlock |
Configurable (e.g., Alternative Login) |
|
Usage
Sign In
The login sequence follows the configured authentication factors: Comparison Source, Primary Authentication, and Secondary Authentication.
Scenario 1: Barcode, Face, and Passcode Authentication
Shared Device Authentication Configuration:
- Comparison Source: Barcode
- Primary Authentication: Face
- Secondary Authentication: Passcode
| Instructions | Screen Capture |
|---|---|
|
Step 1: On the lock screen, scan the user barcode. |
|
|
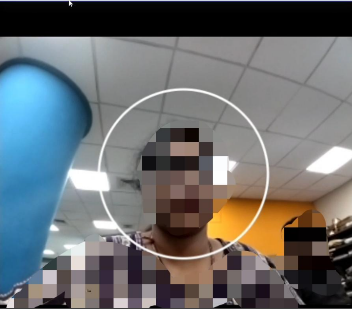
Step 2: The front camera activates for face verification. Position the face within the on-screen guide. |
|
|
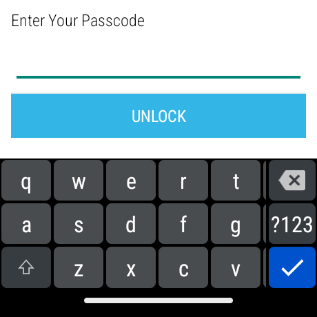
Step 3: the passcode entry screen appears. Enter the passcode and tap UNLOCK. |
|
|
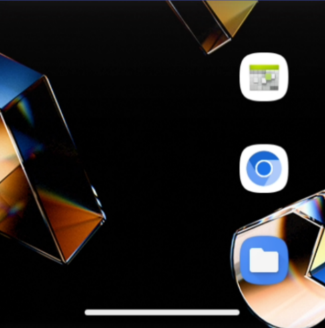
Step 4: The device unlocks and the home screen appears. |
|
Scenario 2: NFC, Face, and Passcode Authentication
Shared Device Authentication Configuration:
- Comparison Source: NFC
- Primary Authentication: Face
- Secondary Authentication: Passcode
| Instructions | Screen Capture |
|---|---|
|
Step 1: On the lock screen, select Tap to Unlock. |
|
|
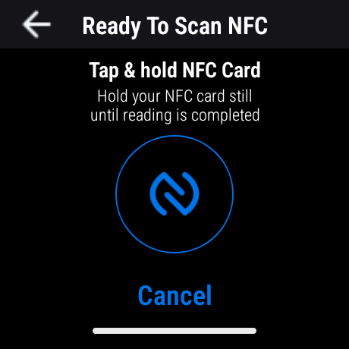
Step 2: Tap the user NFC card against the device. |
|
|
Step 3: The front camera activates for face verification. Position the face within the on-screen guide. |
|
|
Step 4: The passcode entry screen appears. Enter the passcode and tap UNLOCK. |
|
|
Step 5: The device unlocks and the home screen appears. |
|
Scenario 3: Barcode, Passcode, and Face Authentication with Suppress Camera Preview
Shared Device Authentication Configuration:
- Comparison Source: Barcode
- Primary Authentication: Passcode
- Secondary Authentication: Face
Facial Authentication Configuration:
- Suppress Camera View: On
| Instructions | Screen Capture |
|---|---|
|
Step 1: On the lock screen, scan the user barcode. |
|
|
Step 2: The passcode entry screen appears. Enter the passcode and tap UNLOCK. |
|
|
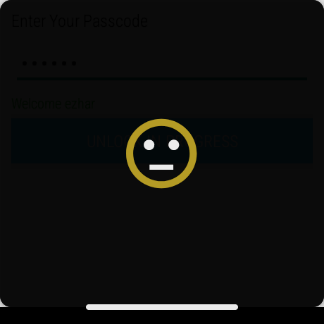
Step 3: The front camera activates for face verification. Instead of the preview screen, a yellow neutral face icon is displayed. |
|
|
Step 4: When the face capture is acceptable, a green smiley face icon is displayed. |

|
|
Step 5: The device unlocks and the home screen appears. |
|
Scenario 4: Barcode, Face, and Passcode Authentication with Suppress Camera Preview
Shared Device Authentication Configuration:
- Comparison Source: Barcode
- Primary Authentication: Face
- Secondary Authentication: Passcode
Facial Authentication Configuration:
- Suppress Camera View: On
| Instructions | Screen Capture |
|---|---|
|
Step 1: On the lock screen, scan the user barcode. |
|
|
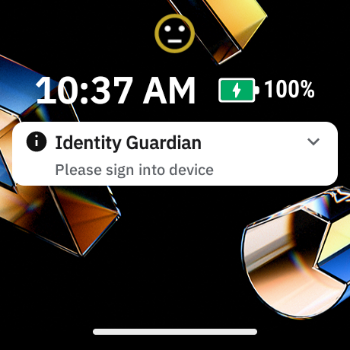
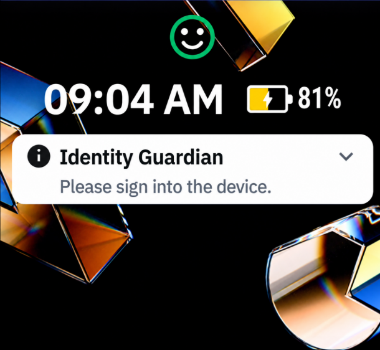
Step 2: The front camera activates for face verification. Instead of the preview screen, the lock screen remains with a yellow neutral face icon displayed. Capture the face. |
|
|
Step 3: When the face capture is acceptable, the icon turns into a green smiley face. |
|
|
Step 4: The passcode entry screen appears. Enter the passcode and tap UNLOCK. |
|
|
Step 5: The device unlocks and the home screen appears. |
|
Scenario 5: NFC, Passcode, and Face Authentication with Suppress Camera Preview
Shared Device Authentication Configuration:
- Comparison Source: NFC
- Primary Authentication: Passcode
- Secondary Authentication: Face
Facial Authentication Configuration:
- Suppress Camera View: On
| Instructions | Screen Capture |
|---|---|
|
Step 1: On the lock screen, select Tap to Unlock. |
|
|
Step 2: Tap the user NFC card against the device. |
|
|
Step 3: The passcode entry screen appears. Enter the passcode and tap UNLOCK. |
|
|
Step 4: The front camera activates for face verification. Instead of the preview screen, a yellow neutral face icon is displayed. Capture the user's face. |
|
|
Step 5: When the face capture is acceptable, the icon turns into a green smiley face. |
|
|
Step 6: The device unlocks and the home screen appears. |
|
Admin Bypass Login
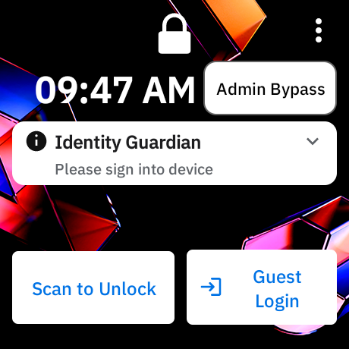
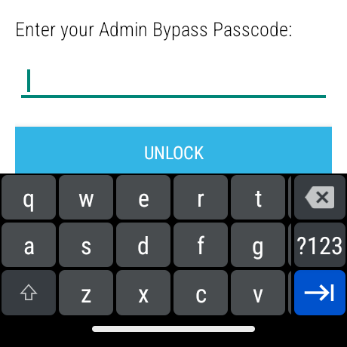
Bypass the user login with the defined ADMIN BYPASS PASSCODE configured by the administrator. This applies when the Fallback Authentication Method in Shared Device Authentication is set to ADMIN BYPASS PASSCODE.
| Instructions | Screen Capture |
|---|---|
|
Step 1: On the lock screen, open the three-dot menu and select Admin Bypass. |
|
|
Step 2: Enter the administrator bypass passcode and select UNLOCK. |
|
|
Step 4: The device unlocks and the home screen appears. |
|
Alternate Sign-In
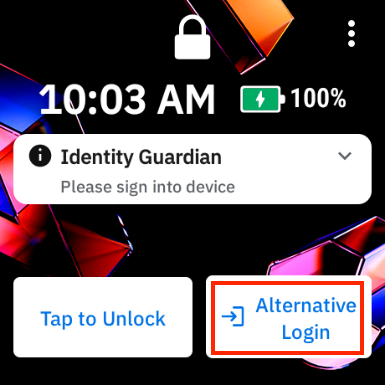
Alternate Sign-In (also known as Alternative Login) enables temporary users without permanent credentials to securely access Shared Devices while maintaining user accountability.
The button label displayed on the lock screen and the resulting authentication workflow are defined by the administrator. For configuration and workflow details, see Alternate Sign-In.
Unlock Device
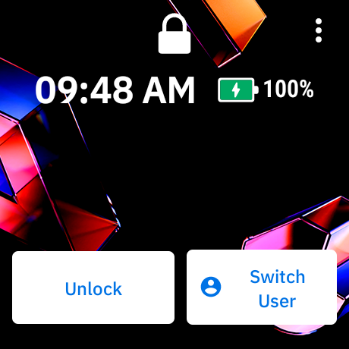
After an initial login, the user session remains active even when the screen locks due to an inactivity timeout, manual screen off, or power state change. In this state, the lock screen displays the Unlock button, allowing the signed-in user to resume the active session.
If no active session exists, the device displays the standard initial sign-in prompts (Scan to Unlock or Tap to Unlock) rather than the Unlock button.
The unlock sequence bypasses the initial identity comparison source and prompts directly for the configured authentication factors: Primary Authentication and Secondary Authentication (if enabled). Sample unlock procedures are detailed below.
Scenario 1: Face and Passcode Authentication without Suppress Camera Preview
Shared Device Authentication Configuration:
- Primary Authentication: Face
- Secondary Authentication: Passcode
Facial Authentication Configuration:
- Suppress Camera View: Off
| Instructions | Screen Capture |
|---|---|
|
Step 1: On the lock screen, tap Unlock. |
|
|
Step 2: The front camera activates for face verification. Position the face within the on-screen guide. |
|
|
Step 3: The passcode entry screen appears. Enter the passcode and tap UNLOCK. |
|
|
Step 4: The device unlocks and the home screen appears. |
|
Scenario 2: Face and Passcode Authentication with Suppress Camera Preview
Shared Device Authentication Configuration:
- Primary Authentication: Face
- Secondary Authentication: Passcode
Facial Authentication Configuration:
- Suppress Camera View: On
| Instructions | Screen Capture |
|---|---|
|
Step 1: On the lock screen, tap Unlock. |
|
|
Step 2: The front camera activates for face verification. Instead of the preview screen, the lock screen remains with a yellow neutral face icon displayed. Capture the face. |
|
|
Step 3: When the face capture is acceptable, the icon turns into a green smiley face. |
|
|
Step 4: The passcode entry screen appears. Enter the passcode and tap UNLOCK. |
|
|
Step 5: The device unlocks and the home screen appears. |
|
View Device Information
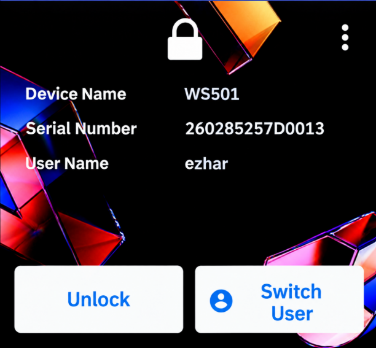
Device information, including the device name, serial number, and currently signed-in user name, can be viewed directly from the lock screen without unlocking the device. The screen UI varies depending on whether there is a user logged in.
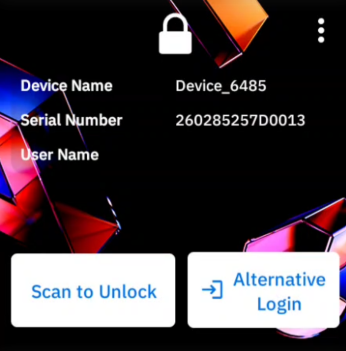
No User Logged In: Displays the device friendly name, serial number, and indicates no active user session.
| Instructions | Screen Capture |
|---|---|
|
Step 1: On the lock screen, perform a vertical swipe up. |
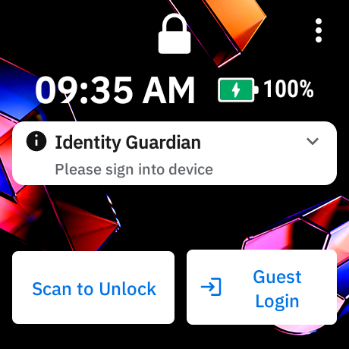
|
|
Step 2: The device friendly name and serial number are displayed. Swipe down to return to the lock screen. |
|
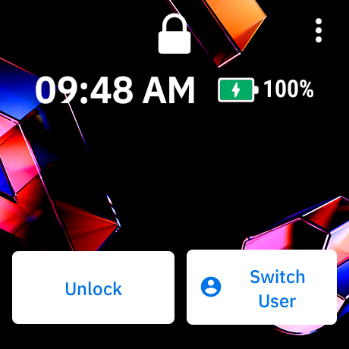
User Logged In: Displays the device friendly name, serial number, and the full name of the currently signed-in user.
| Instructions | Screen Capture |
|---|---|
|
Step 1: On the lock screen, perform a vertical swipe. |
|
|
Step 2: The device friendly name and serial number are displayed. |
|
Switch User
The Switch User option displays on the lock screen when a user session is active on a Shared Device. This feature enables a different user to authenticate and begin a new session without requiring the previous user to explicitly sign out beforehand.
On a locked device with an active session, the lock screen provides two primary actions:
Unlock: Prompts for the configured secondary factor or unlock sequence to resume the existing session for the currently signed-in user.
Switch User: Terminates the active session and returns the device to the initial sign-in screen (Scan to Unlock or Tap to Unlock), allowing a new user to authenticate.
Sign Out
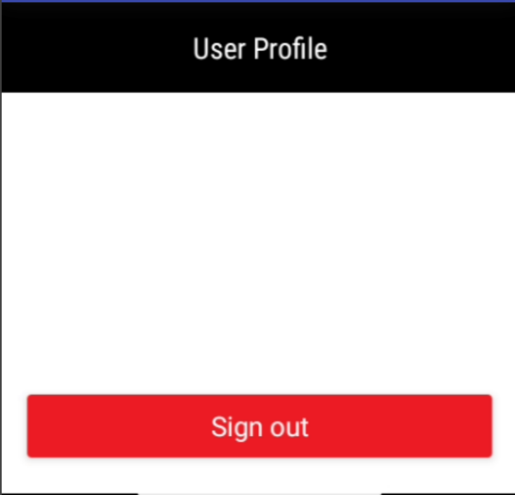
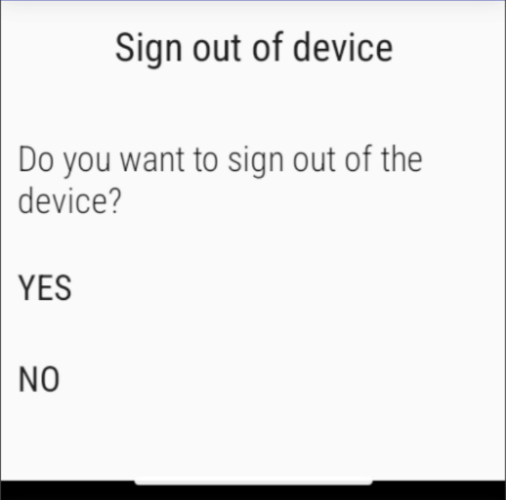
A user can sign out from the Identity Guardian user profile screen.
| Instructions | Screen Capture |
|---|---|
|
Step 1: Open Identity Guardian. |
|
|
Step 2: Tap Yes to confirm sign-out. |
|