Overview
Solutions from Zebra partners that integrate Wireless Insights consist of several distinct components:
- Zebra's On-Device Service: The built-in Wireless Insights service that collects data and generates insights on the device.
- Vendor-Specific Agent: A partner-provided agent installed on the device to forward data to the respective cloud server.
- Vendor Cloud Platform: The partner's cloud infrastructure, which handles server communication, data storage, and visualization through dashboards.
The setup process involves deploying the device components and applying the necessary licenses. Configuration of the vendor's dashboard is specific to each partner and is not covered in this guide.
Important: Vendor-specific partner solutions currently capture only Wi-Fi data, not cellular data on Zebra devices.
Requirements
Device Requirements
- Supported device and OS version: Refer to the Zebra support portal for compatible Zebra device models, Android platform, and OS versions.
- Zebra Professional Series Devices: A Mobility DNA Enterprise license is required for the built-in Wireless Insights service.
- Wireless Insights License: Procure a license through the Zebra Software Licensing platform and installed on the device; see Licensing for more information.
- Vendor-Specific Device Agent: Install the vendor-specific agent on the device. This agent is unique to each infrastructure vendor. Contact the respective vendor for the device agent installation file.
Cloud Platform
- Vendor-specific cloud dashboard and license: The infrastructure partner provides a dashboard through their cloud platform. Vendor-specific dashboards supported:
- Aruba
- Extreme Networks
- Mist
Zebra Wireless Insights APIs are available to partners upon request to enable integration of the real-time device data stream into their cloud dashboard.
Installation
Use Zebra's StageNow or an Enterprise Mobility Management (EMM) system to deploy the vendor-specific device agent.
Prerequisites
Zebra Prerequisites
- Connect the device to a Wi-Fi network with access to Zebra's License Server.
- The time and date on the device must be properly set or managed.
Cloud Vendor-Specific Prerequisites
- Contact the vendor for the device on-boarding procedure.
Procedure
The following procedure is an example of how to install a vendor device agent, if it is the recommended method using StageNow (for large scale deployments, other tools can be used for mass device deployment, such as OEMConfig or a third party EMM):
- Open StageNow on a host computer.
- In the StageNow home screen, click Create New Profile from the left menu.
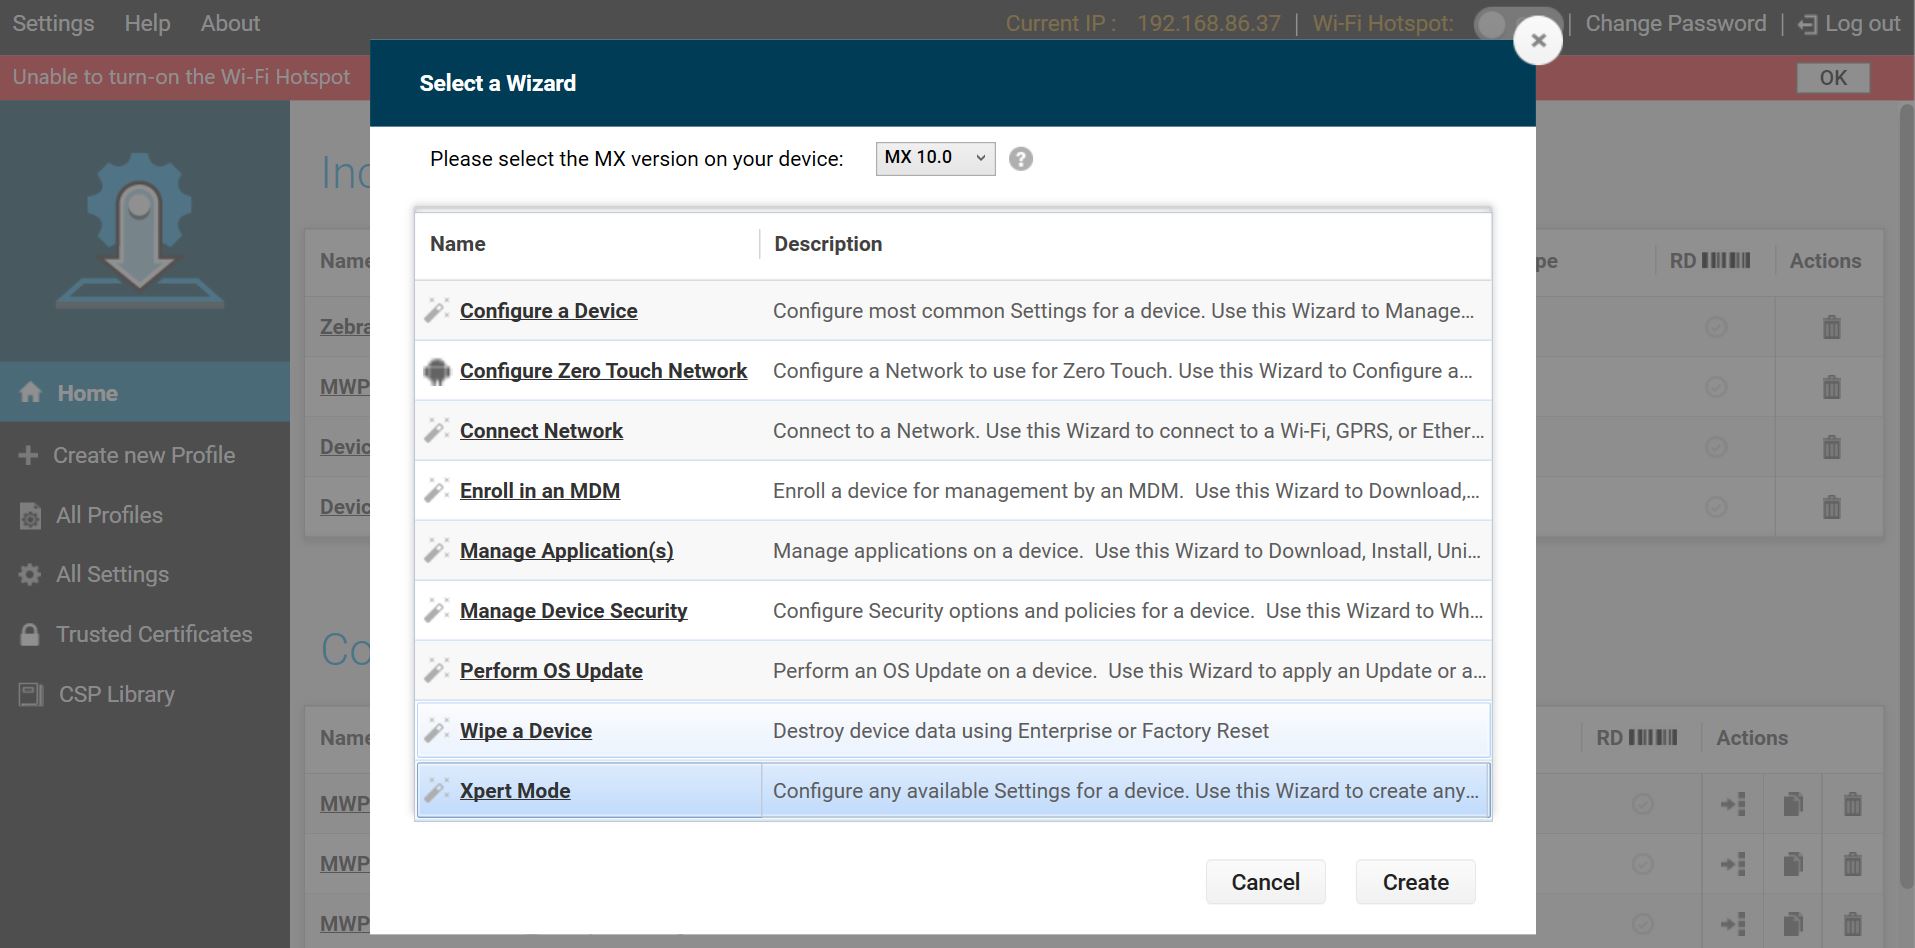
- Ensure the proper MX version 8.3 or higher is selected at the top drop-down selector. The MX version on the device should match this or higher. See MX documentation for instructions how to check the version.
- Select Xpert Mode from the list and click Create.
- Enter the profile name. Click Start.
- If using StageNow to copy the install file to the device, scroll down and click the plus (+) sign next to FileMgr. This adds FileMgr to the Config tab on the right side.
- Scroll to AppMgr and click the plus (+) sign next to it. This adds AppMgr to the Config tab on the right side.
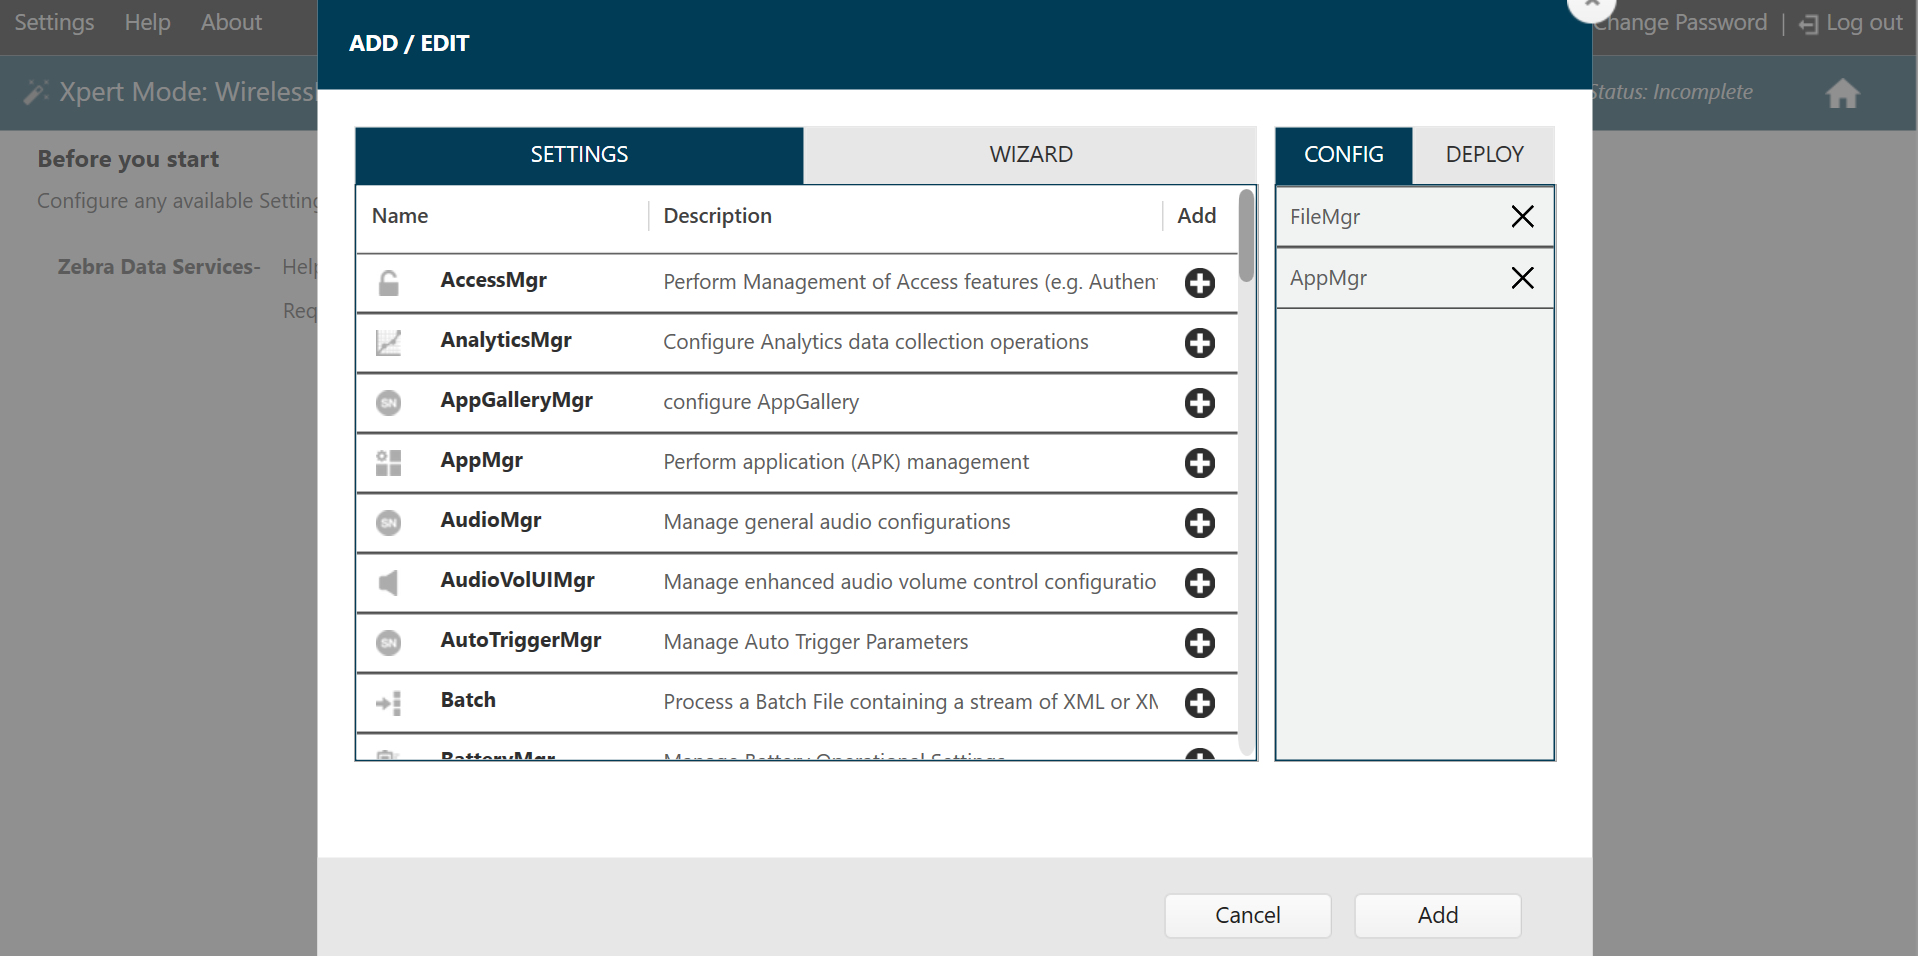
- Click Add.
- If using StageNow to copy the install file to the device, proceed with this step. Otherwise, skip to step 10.
StageNow Config 1 - Copy the install file to the device with FileMgr. In the FileMgr screen under the Create New Setting tab, select and enter the desired options to install the APK, for example: _ File Action: Transfer/Copy File _ Target Access Method: File in the device file system _ Target Path and File Name: [enter file path] _ Source Access Method: [select applicable method] * Source File URI: [enter information prompted] Click Continue. - StageNow Config 2 – Install the client app. For AppMgr, select the following: * Action: Install
Enter/select the desired options for the remaining fields. Click Continue. - Click Complete Profiles. Profile creation is complete.
- Select one of the following based on the deployment method:
- StageNow: Generate the barcode from the StageNow profile. Open StageNow client on the device and scan the barcode(s) generated.
- EMM: Export XML from the StageNow profile. Do not edit the XML file - it can cause unexpected behavior. Send the XML using either OEMConfig or MX to be consumed by the EMM.
Configuration
The following configurations are required on the device:
- Apply the Wireless Insights license.
- Activate the Wireless Insights stack (disabled by default).
- Set a password for the packet-capture feature, which is an optional feature.
Deploy Wireless Insights configurations using one of the following methods:
- StageNow
- EMM
- OEMConfig
Prerequisites
- See required StageNow and MX versions from WorryFreeWiFiMgr, aka Wireless Analyzer.
Procedure
The following procedure is an example of how to configure Wireless Insights, if it is the recommended method using StageNow (for large scale deployments, other tools can be used for mass device deployment, such as OEMConfig or a third party EMM):
- Open StageNow on a host computer.
- In the StageNow home screen, click Create New Profile from the left menu.
- Ensure the proper MX version 10.2 or higher is selected at the top drop-down selector. The MX version on the device should match this or higher. See MX documentation for instructions how to check the version.
- Select Xpert Mode from the list and click Create.
- Enter the profile name. Click Start.
- Scroll down and click the plus (+) sign next to LicenseMgr to apply the license. This adds LicenseMgr to the Config tab on the right side.
- Scroll to WorryFreeWiFiMgr and click the plus (+) sign next to it. This adds WorryFreeWiFiMgr to the Config tab on the right side.
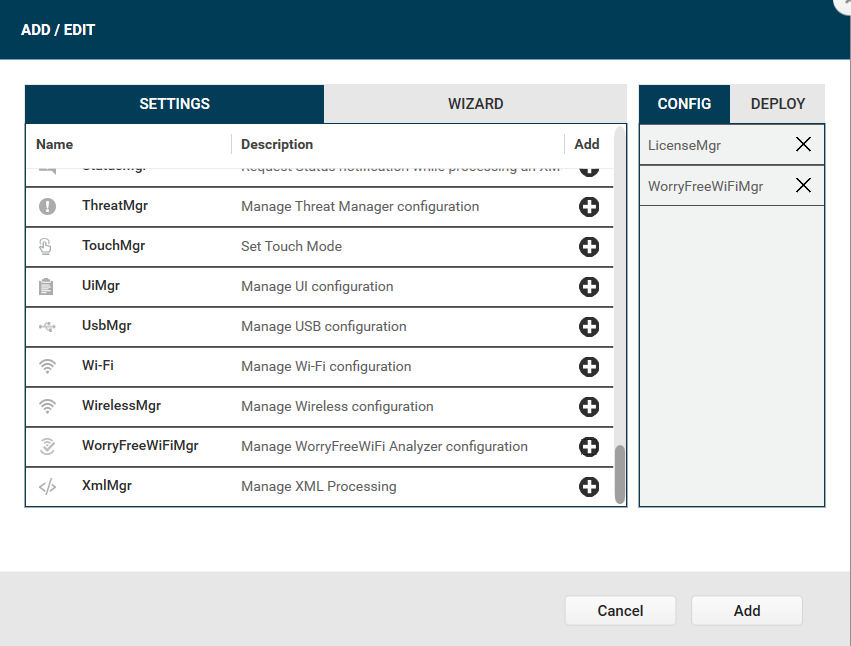
- Click Add.
- In the LicenseMgr screen under the Create New Setting tab, select one of the following procedures based on how the license is generated:
If the license is generated from a Cloud Licensing Server (CLS), select or enter the following options:
• License Action Type: Perform Zebra license action
• Zebra License Action: Activate Feature
• Feature Name: [Enter the feature name provided by Zebra Software Licensing, e.g. wfw-feature-api-eval]
• License Source URL: [Enter the URL provided by Zebra Software Licensing]
• License Source Friendly Name: [Enter a friendly name and record it for future reference]
Otherwise, if the license is generated as an Activation ID (AID) of 32 digits, select or enter the following options:
• License Action Type: Perform Zebra license action
• Zebra License Action: Activate Feature
• Feature Name: [Enter the feature name provided by Zebra Software Licensing, e.g. wfw-feature-api]
• License Source URL: [Enter the URL provided by Zebra Software Licensing]
• License Source Friendly Name: [Enter a friendly name and record it for future reference]
Click Continue. - For WorryFreeWiFiMgr, select or enter the following options:
_ Activate/Dactivate Analyzer: Turn on
_ Configure Global Settings: [toggle checkbox to enable]
_ Global Settings Password: [enter password]
_ Old Password: [To reset the Global Settings Password from a previous setup, enter the current password] * End User Control: Do not change
Click Continue. - Click Complete Profiles. Profile creation is complete.
- Select one of the following based on the deployment method:
- StageNow: Generate the barcode from the StageNow profile. Open StageNow client on the device and scan the barcode(s) generated.
- EMM: Export XML from the StageNow profile. Do not edit the XML file - it can cause unexpected behavior. Send the XML using either OEMConfig or MX to be consumed by the EMM.
Note: This procedure bundles multiple configurations into a single barcode or XML file. Alternatively, configurations can be provisioned separately or in any combination with other bundles (Zebra or third party).
Verification
WorryFree WiFi Analyzer, aka Wireless Analyzer, is a built-in app on Zebra devices that can be optionally used to verify the activation of the Wireless Insights stack and the password set for packet capture.
Note: This application should not be used for starting any feature. It is only used to view the verification steps shown below.
To verify activation of the Wireless Insights stack:
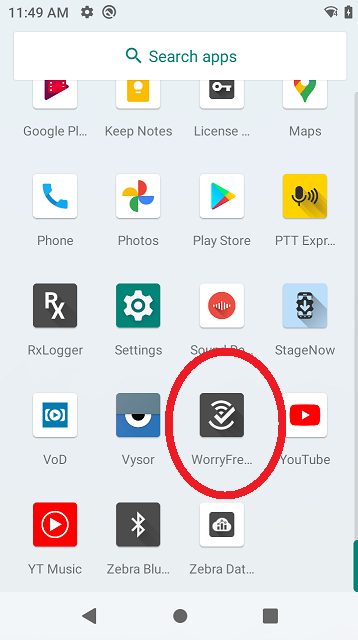
- Launch WorryFree WiFi Analyzer app.
- If “Analyzer Activated” is displayed in green, Wireless Insights is successfully activated.
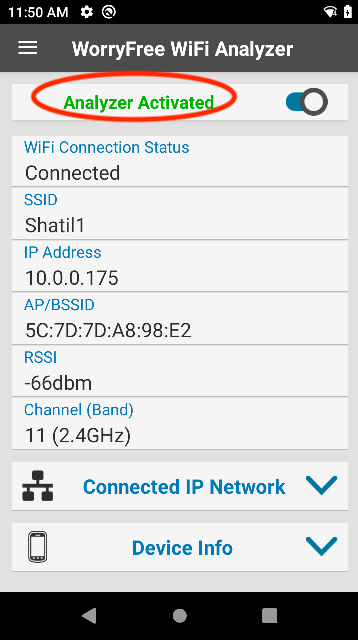 Otherwise, it displays “Analyzer Not Activated” in red.
To verify the password is set for packet capture:
- Launch WorryFree WiFi Analyzer app.
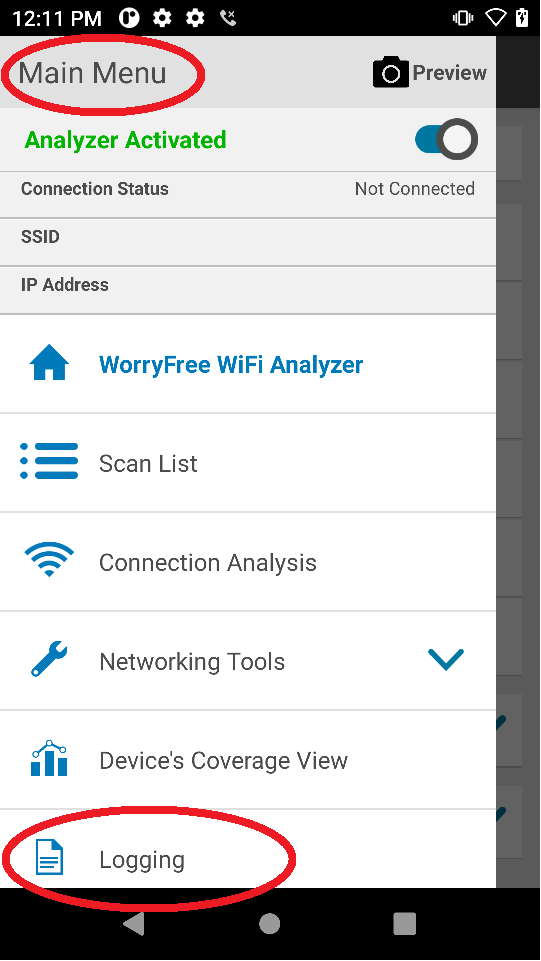
- From the Main Menu, tap Logging.
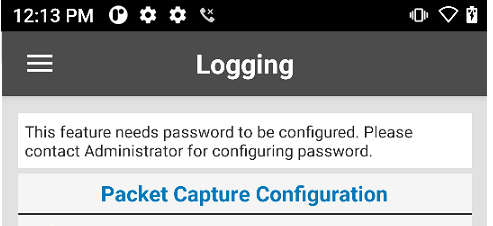
- Select All Packets under Packet Capture Type.
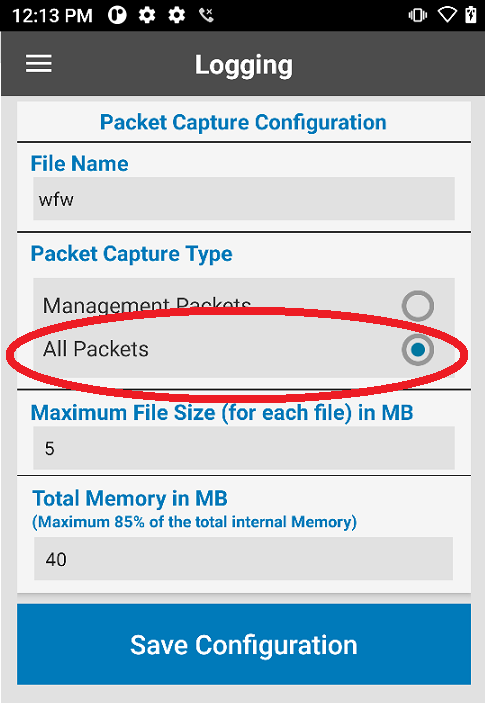
- If a message does not appear, the password was set successfully. Otherwise, a message appears indicating the password needs to be configured as follows: